

I am going to show you how I turned garbage into ART by repurposing this box I saved from the landfill into some really pretty storage to hold all my STAMPlorations stuff in one convenient place.

And an added bonus to my using a box for this tutorial is that it has four sides, so I tried out something a little bit different on each one - all of which I will share with you!

Before I get started here is a photo of the products that I will be refering to in the step-by-step tutorial below.

 |
| I started with this sturdy cardboard box and used my stash of inky paper towels to cover it. Lynne's Mixed Media Tip#1: I never throw away my inky paper towels but use them as the starting point to most of my mixed media projects. |
 |
| Paper, even paper towel is pretty flimsy when it gets wet so I use a concoction of matte Mod Podge and water cut 50/50 and a very delicate touch with my brush. Make sure you get the paper wet on both sides (back and front) when applying it to the box or you will get bubbles that can cause problems once they dry. Also, you need to let everything dry thoroughly before the next step. Note: paper towel is quite sturdy after it has dried and the wrinkles give you all that lovely texture without any work. |
 |
| After my box was dry I used masking tape to tape down my Happy Flower stencil and a pallet knife to push some gold colored Ferro (by Viva) through the stencil to create 3-dimensional, textured flowers. Once these had dried it was really easy to outline the flowers in black waterproof pen to make them really pop. |
 |
| Now a bit about Ferro - it is like a very thick metalic paint mixed with a fine-grained sand. It is amazing through a stencil because it does not run and holds its shape beautifully, and the sand is so fine even the tiniest details come through clearly. I think it worked especially well with this Happy Flower stencil and an added bonus was how quickly it dried - in less than 30 minutes! Note: wash stencil as soon as you are finished, do not let this product dry in your stencil. |
 |
| I accented the background of my box by using my finger to rub some Golden heavy-body acrylic paint over areas where I wanted to hide some of the text that was showing through or where I wanted to add more color. But then I faded back that color by dry brushing white gesso over top until everything was the softness I wanted. |
 |
| Lynne's Mixed Media Tip #2: Mixed Media is all about adding and taking away and then adding back in again. More close ups of the wonderful texture that paper towel and acrylic paint and gesso gives the project... |
 |
| Here is another close up of the towel-covered box side. Note: when you are enhancing your mixed media backgrounds like this, nothing you do is wrong. |
 |
| For this side I used Gun Metal Ferro - you can really see the sparkly sand in this image. |
 |
| And now for the back side ... |
 |
| Using my mini bubbles stencil, I added even more texture. I used a new-to-me product Art Anthology's Sorbet - a dimensional gel paint which looks like icing, is easy to use and is very subtle when it dries - exactly what I was looking for. |
 |
| For these next flowers I used another new-to-me product by Dreamweaver, Crackled Texture Paste... it was super easy to use, thick enough to go through the stencil and hold it's shape and it dried with these beautiful crackles! |
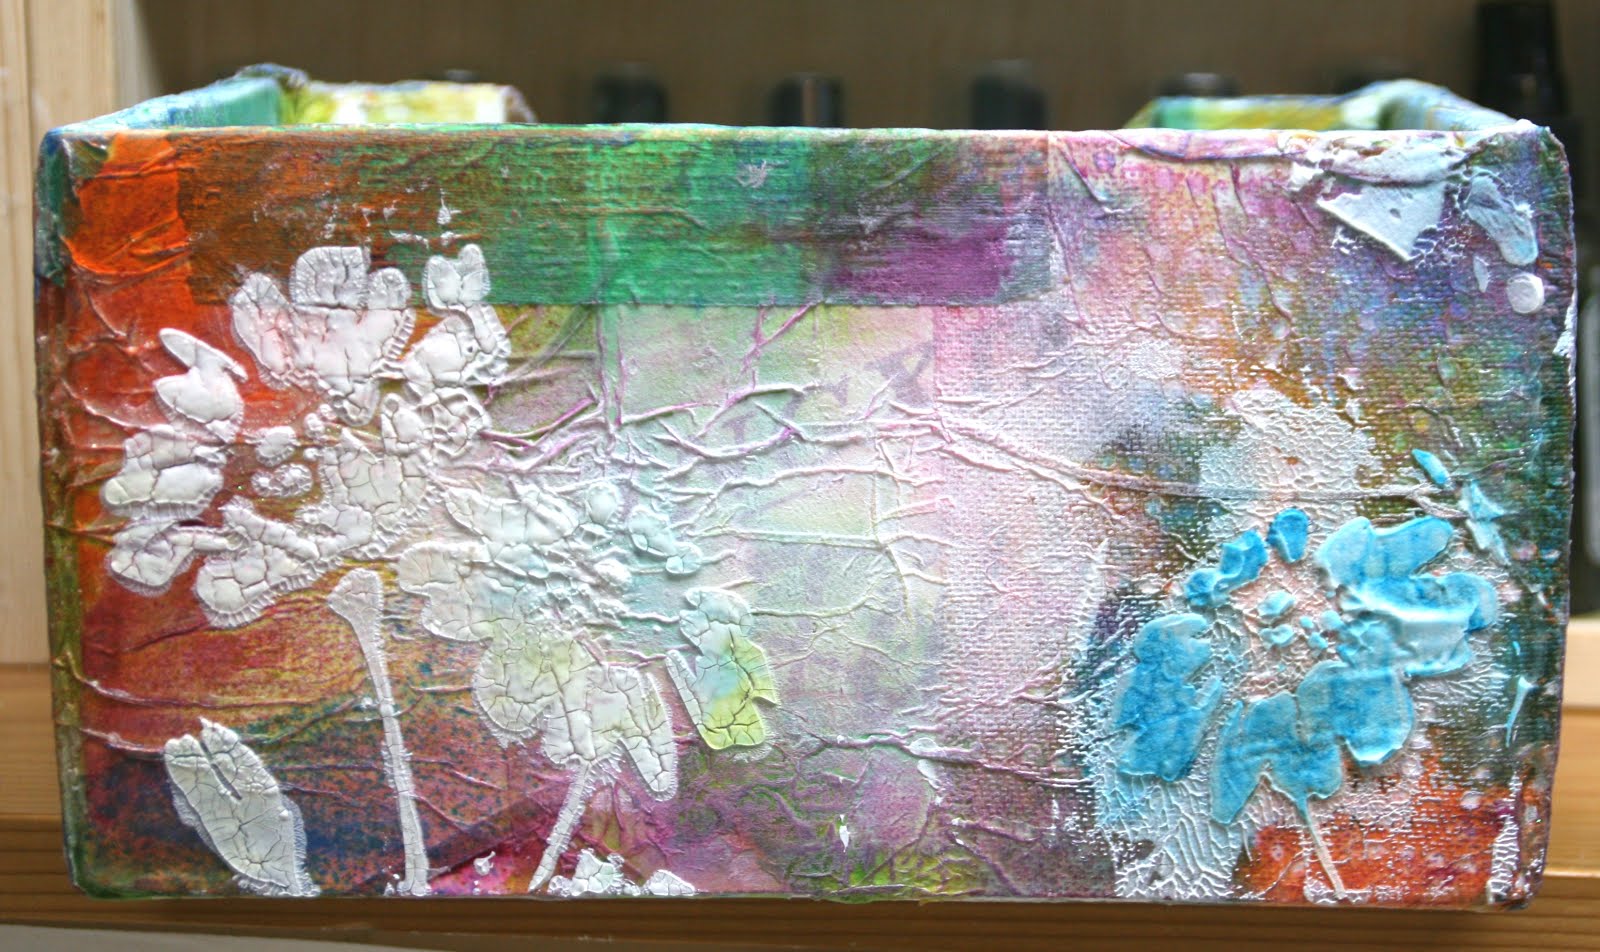 | |
| Even the messy bits that smeared underneath the stencil looked great after it had dried. |
 |
| And even better, the crackle paste, once dried, had a beautiful matte finish which absorbed the ink that I brushed on to it for more color and highlighted those crackles even more. |
 |
| And finally - I added my words using the Bold Stentiments-Create stamp set from STAMPlorations. I am in LOVE with these word stamps! |
 |
| Lynne's Mixed Media Tip #3: stamping words and phrases on tissue paper with waterproof ink and using watered down Mod Podge or liquid gel medium to apply it to the lumpy, bumpy surface. |
 |
| This method works beautifully on anything mixed media - and if you use a paint brush wet with clean water to "outline" the stamped phrase it tears away perfectly with a ragged edge that blends into the surface so you have to look very closely to see that it was not stamped right onto your project. |
 |
| Just remember to use a delicate touch when applying your words to your project as wet tissue is VERY delicate! |
 |
 |
| So here it is-the finished product! My box full of STAMPlorations stuff sitting on my shelf... |
 |
| and looking just as Wonderful as I imagined! |
So I hope you enjoyed my in-depth tutorial and that the time you spent with me today inspires you to repurpose something of your own that was headed for the landfill, mixed media style. (She says Smiling and Waving!)
Lynne Mizera
for the ARTPlorations Mixed Media Design Team

 The following STAMPplorations and ARTplorations products were used on this project:
Lynne Mizera
for the ARTPlorations Mixed Media Design Team

 |
| Happy Flowers ARTplorations Stencil |
 |
| Bubbles ARTplorations Stencil |
 |
| Bold Sentiments-Create STAMPlorations Stamp |
How creative is this project? Love how you've re-cycled the box and thank you so much for the in depth step by step. I enjoy learning and you've taught me lots in this blog post...Thank you so very much. Love the idea, the tecniques and the glorious colour and sentiments, thanks x
ReplyDeleteMac I am honoured that I could teach you something (because I have learned so much from you!!!) I guess we were meant to meet... Thanks for the visit and the comment... You make me happy...Smile
DeleteThis is a BEAUTY of a project Lynne! I often see those boxes and think it such a waste to through them away and then go spent $$$ on something very similar. No fun in spending the cash and Missed out on all that creative time. SUPER FABULOUS post:)))
ReplyDeleteLauraJane... Thank you so much for the visit and for taking time to leave me a comment. I LOVE that you LOVED my project especially because I truly LIVE to INSPIRE!
DeleteLove this project, I have a ton of painted and inked paper towels,but so far I have not done anything except for a few ICAD backgrounds with them. Now I am excited to really play with them. Thanks, great tutorial.
ReplyDeleteLisa, Thank you so much for the lovely comment - because that's exactly why I share all of this ... to get you excited about trying something new! Just remember... everything you do with paper towels is Right and it looks so very different after they have dried!
DeleteWhat a pretty re-purposed storage box :) Thanks for sharing your inspiration with us!
ReplyDeleteThanks so much Shel! and BTW... I am LOVING your ICADs these days!
Delete