Please Respect My Work...

All of the cards, layouts, handmade items and art work displayed on this website are copyright to me, Lynne Mizera. Of course I hope to inspire and encourage you and would be morethan happy for you to use any of my work to that end; however, please respect me and my work and do not directly copy any of my projects without crediting me or enter any of my work into any magazines or competitions without my express written permission. All my cards, layouts, projects and art work are not to be used by any commercial enterprise for any financial, marketing or commercial gain.

Showing posts with label Storage Tips. Show all posts

Wednesday, March 7, 2018

STAMPlorations - New Month, New Challenge and NEW PRODUCT!

Oh Happy, Happy Day everyone!  I am this excited because today for the March month-long challenge and new product reveal over on the STAMPlorations' Blog, I am sharing a couple of projects I created using the new Bloomtangle metal dies. 

These metal dies create a standard card sized die cut from two of my favorite patterns in the Bloomtangle coloring book (swoon) and just LOOK at what I created...
 
To create these cards I used the Bloomtangle Cover Plate #2, some double sided sticky tape and applied micro fine glitter with a paintbrush; they are absolutely spectacular.
I tried very hard to get the perfect photo so you can see the elegant shimmer and the subtle shading.  
I will be doing a more in-depth tutorial on my process later in the month so stay tuned!

And of course, being a mixed media girl, I just had to create something besides a card and just look at what I made using the Bloomtangle Cover Plate #1, some empty tins and inky paper towels...
I now have pretty and coordinated storage containers for my work space and a table top garbage can that looks great!
 
Not only were they super easy and quick to make, but I used a lot of items from my recyle bin... talk about Win! Win!

So that's it for today from me, but you may want to check out what some of the other girls created with these dies HERE.  And while you are there why not read all about the new March challenge?  There are prizes!!
 

And just a note that these are only two of the new STAMPlorations products being released this month ... so head on over to the STAMPlorations store to see all of them.  (And if you are ordering remember to use my special coupon code below to get an additional 20% off your purchase.)

Lynne Mizera
for the STAMPlorations Mixed Media Design Team


Friday, October 13, 2017

Creating Storage In My Studio That Is Practical As Well As Pretty... by Lynne Mizera

 
Hello Everyone!  I am happy to share that I will be staying on with the STAMPlorations Mixed Media Design Team for one more term and today I am up on the STAMPlorations Blog with my first mixed media tutorial for this term.  I am really excited that I will be able to share even more ways to use your STAMPlorations stencils and stamps on mixed media projects for the next year.

Today I am sharing how I decorated this wooden storage container so that not only is it pretty but now it is also a visual example of different styles of pastes and paints through a stencil.  Something that will make it so much easier to for me to choose a product when I am starting a new mixed media project!
 
 
So pop on over to the STAMPlorations blog to read the full article and to see all the details.   As always, thank you for stopping by today to see what I am up to and please do leave me a comment if you like what you are seeing!  (I read every single one and reply when I can...)
Lynne Mizera
for the STAMPlorations Mixed Media Design Team
 
 STAMPlorations products used on this project:
Remember to use my personal discount code: STAMPGIRLLYNNE
to receive an additional 20% off your entire order at STAMPLorations - even sale items

ARTplorations Stencil Ethnic Organic One
Other Products used:
Buzz Gesso - economy ground
Dreamweaver Metallic Copper Embossing Paste
Liquitex Flexible Modelling Paste
Dreamweaver Studio 490 Crackled Texture Paste 
Inka Gold paints
Peerless Watercolor sheets
Angora pan watercolors
Copic Black Multi-liner pens

Wednesday, June 28, 2017

HELP ME! I Have Over 100 Bottles Of Spray Inks! (Sharing My Storage Solution)

Today I am up on the Mixed Up Magazine Blog sharing the system I created for my spray inks.  I am a wee bit embarrassed to reveal that I own more than 100 bottles of ink sprays.  I can justify this incredible number because I use all of them on a regular basis, but I am sure you can imagine the storage nightmare I have created for myself.  I needed to find a storage solution that allowed me to see all my colors, that kept the bottles within easy reach, and most important of all I need a system that was simple to maintain and made it easy to put everything back.  Here is my solution!
I had these shelving units custom made.  I am sure I could have found similar shelving from a store, but these units, that were modified from a unit designed to hold essential oil bottles, have a tiny lip on the front of each shelf as well as each shelf slanting slightly toward the back all of which keep the bottles from falling on my head.  (This is very important I have discovered as I am constantly having tubs of modelling paste falling off the shelving unit on the left side of this photo and hitting me in the head all the time!)
I LOVE my shelves!  They are mounted above the paper-covered spot where I do all my messy work, and they hold up to 98 bottles of sprays.  I have organized my sprays by color families -  warms, cools and neutrals - which makes it really easy to find the colors I want and their compliments.

The best part is that no matter how big the mess I create I can put everything back again onto the right spot in seconds.
But after using my awesome ink storage system for a while I discovered that I was wasting a lot of ink when I was trying to choose just the right color spray.  I would spray the inks onto a paper towel to see the exact shade and to compare colors, and often times I would spray more than once.  I finally decided it would be worth the time to create some sort of visual catalog of my inks. And this is it!
To create this visual index I scored two pieces of 81/2 x 11 inch 90lbs card stock every 1.25 inches.  This created a grid of 35 squares - five rows of seven squares across each page.  Then I sprayed my inks onto some thick card stock, cut out a square that fit into my grid and then numbered and labeled the square.
I added the corresponding number to the spray ink bottle using masking tape and a waterproof marker.  I think the numbering is what makes this system so easy to use.
And finally I added basic color wheel information to the back of each sheet and then laminated them and put them on a metal ring.  They now hang next to my sprays and are a my "Go To" reference sheets for both spray color and color matching!
​​

​​
Now I can pick the perfect shade of spray every time and I can see which sprays sparkle, which glitter and which just shimmer.  I find I am using all my colors more often instead of always grabbing  my "go to" bottles and that I am can now factor in the glitter qualities of each spray on  my projects.  So What do I do with all these sprays? Well....
​​
I use so many spray products in my art journalling and mixed media card and tag making that I have a huge stash of beautifully inked paper towels and I now use inky paper towels in all my mixed media art.  Lately, it seems, every one of my projects start with a first layer of inky paper towels glued to the substrate and I go from there.  Here are a few examples: This is a stretched canvas covered in inky paper towels and a bit of gesso waiting for me to pull out an image using paint and paper...
​​
Here is a canvas in progress that started like the one above.   I am use acrylic paint and inks to start pulling out an image of whimsical flowers that I see in this inky paper towel base...
​​
And here is a plain old cardboard box which I turned into pretty storage for my open shelves using inky paper towels, stencils and pastes and some stamped images....
​​
Can you see all that delicious texture the paper towel layer created? 
​​
So that's my share for this month... I hope you enjoyed your peek into this corner of my creative space and I hope that now you too will start using your sprays and hoarding inky paper towels to use in a whole new way!  And here is a little teaser for another blog post:  In my studio space I create storage that is both functional and pretty acting as art work on my walls and visual aids in my studio.
​​
So you will want to keep coming back to see what I share next!
Lynne Mizera, Mixed Media Artist
for the Mixed Up Mag Design Team


Monday, April 10, 2017

Easy-To-Make and Pretty-To-Look-At Stencil Storage


Hello and happy April everyone... Lynne here today with my monthly tutorial and this month's post is all about how I store my stencils.

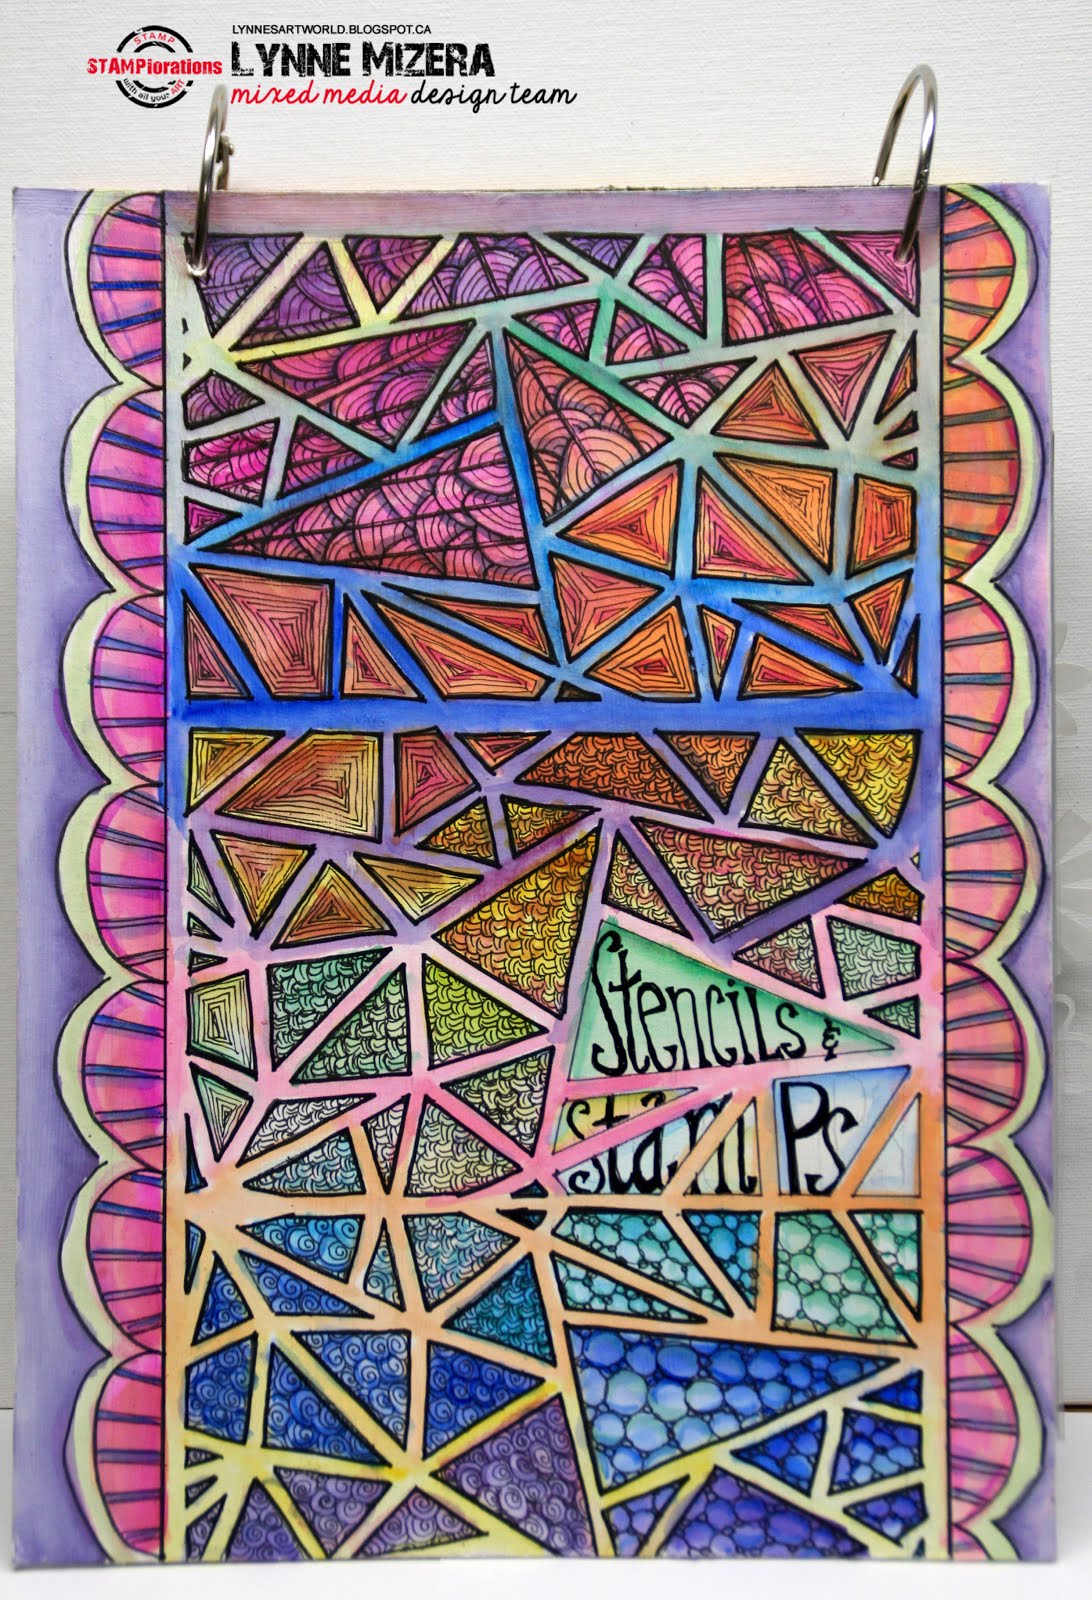
I create my own stencil books out of heavy cardboard (saved from products I have bought) and clear plastic scrapbook page protectors all  held together with a couple of metal rings from the dollar store.  And because they are so pretty  there is the added advantage of the wall art they create in my studio because I hang my books on the wall so they are within easy reach.

I now have enough ARTploration stencils to warrant their own book so I decided to make a new one and to decorate it Lynne-style.... Here is the finished product..
I detailed all the steps in my process over on the STAMPlorations blog today so pop on over if you want to know how I made this...

And, as always, thank you for popping in today to see what I am up to and please do leave me a comment if you like what you see!!

Lynne Mizera, Mixed Media Artist
for the STAMPlorations Mixed Media Design Team

STAMPlorations products used on this project:
(Get 20% off your ENTIRE Order over at STAMPlorations when you use my Personal Discount Code: STAMPGIRLLYNNE)
  

Other products used on this project:
Micron Black Pens
Sharpie Fine Point Pen
Art Basics Heavy Gesso
Peerless Watercolor paint chips


Sunday, April 2, 2017

Creating Beautiful Storage For Your Creative Space...


Happy Sunday everyone and Happy Spring!  Yes it's April 2nd and Spring has finally sprung here in the Creston valley of beautiful British Columbia, Canada. And today, as it's Stencil Sunday over on the STAMPlorations blog, I want to inspire you by sharing this beautiful storage box I decorated to house my STAMPlorations stamps using the Peony 1 Stencil and a few different pastes.   

This box sits out in the open on the shelving I have in my Studio where I can see it and find it quickly and easily so I wanted it to look amazing.  And it has the added advantage of being an easy-to-see example of what different products look like through a stencil when I am trying to decide what I want to use on a project.

A base coat of dark teal Golden acrylic paint, a layer of Plaid crackle medium and a top coat of white Golden acrylic paint gave me a starting point and then I used Stampendous Dreamweaver Metallic Gold and Glossy Red embossing pastes through the ARTplorations Peony 1 stencil waiting for the red paste flower to dry before layering the second flower in gold paste over top.  I just love how the crackles can still be seen through the gold paste, don't you? 
And finally I used this wonderful product by Pebeo called Cerne Relief to outline the flowers once they had dried.  It just added that little something extra to make them pop and the product went on so beautifully and dried so quickly that I am now using it on everything I do these days!
So that's it for my inspiration for you this month.  And this being the first Sunday of the month we have a brand new "Anything Goes Except a Card" Mixed Media challenge, just use a stencil, any brand.  There are always prizes to be won!!
Prizes:
- $10 gift certificate to the winner voted by the Mixed Media team
- $5 gift certificate each to the 2 top picks
- If there are 25 or more entries: 1 random winner of any 2 standard size stencils
Lynne Mizera, Mixed Media Artist
for the STAMPlorations Mixed Media Design Team
  

STAMPLorations Products used on this project
(Get 20% off your ENTIRE Order over at STAMPlorations when you use my Personal Discount Code! STAMPGIRLLYNNE)
ARTplorations Peony 1

Other products used on this project
 Stampendous Dreamweaver Embossing Pastes
- Glossy Red
- Gold Metallic
Golden Fluid Acrylic Paint
- Dark Teal
- White
Plaid Folk Art Crackle Medium
Pebeo Cerne Relief
- Imitation Lead


Friday, January 27, 2017

Turning An Empty Tin Into Giftable Storage...

 
Happy Friday Everyone!  Lynne here today and for my first mixed media tutorial in 2017 on the STAMPlorations Blog I am going to show you how I turn empty Coffeemate tins into unique and lovely containers which I fill with treats to gift to friends and family.

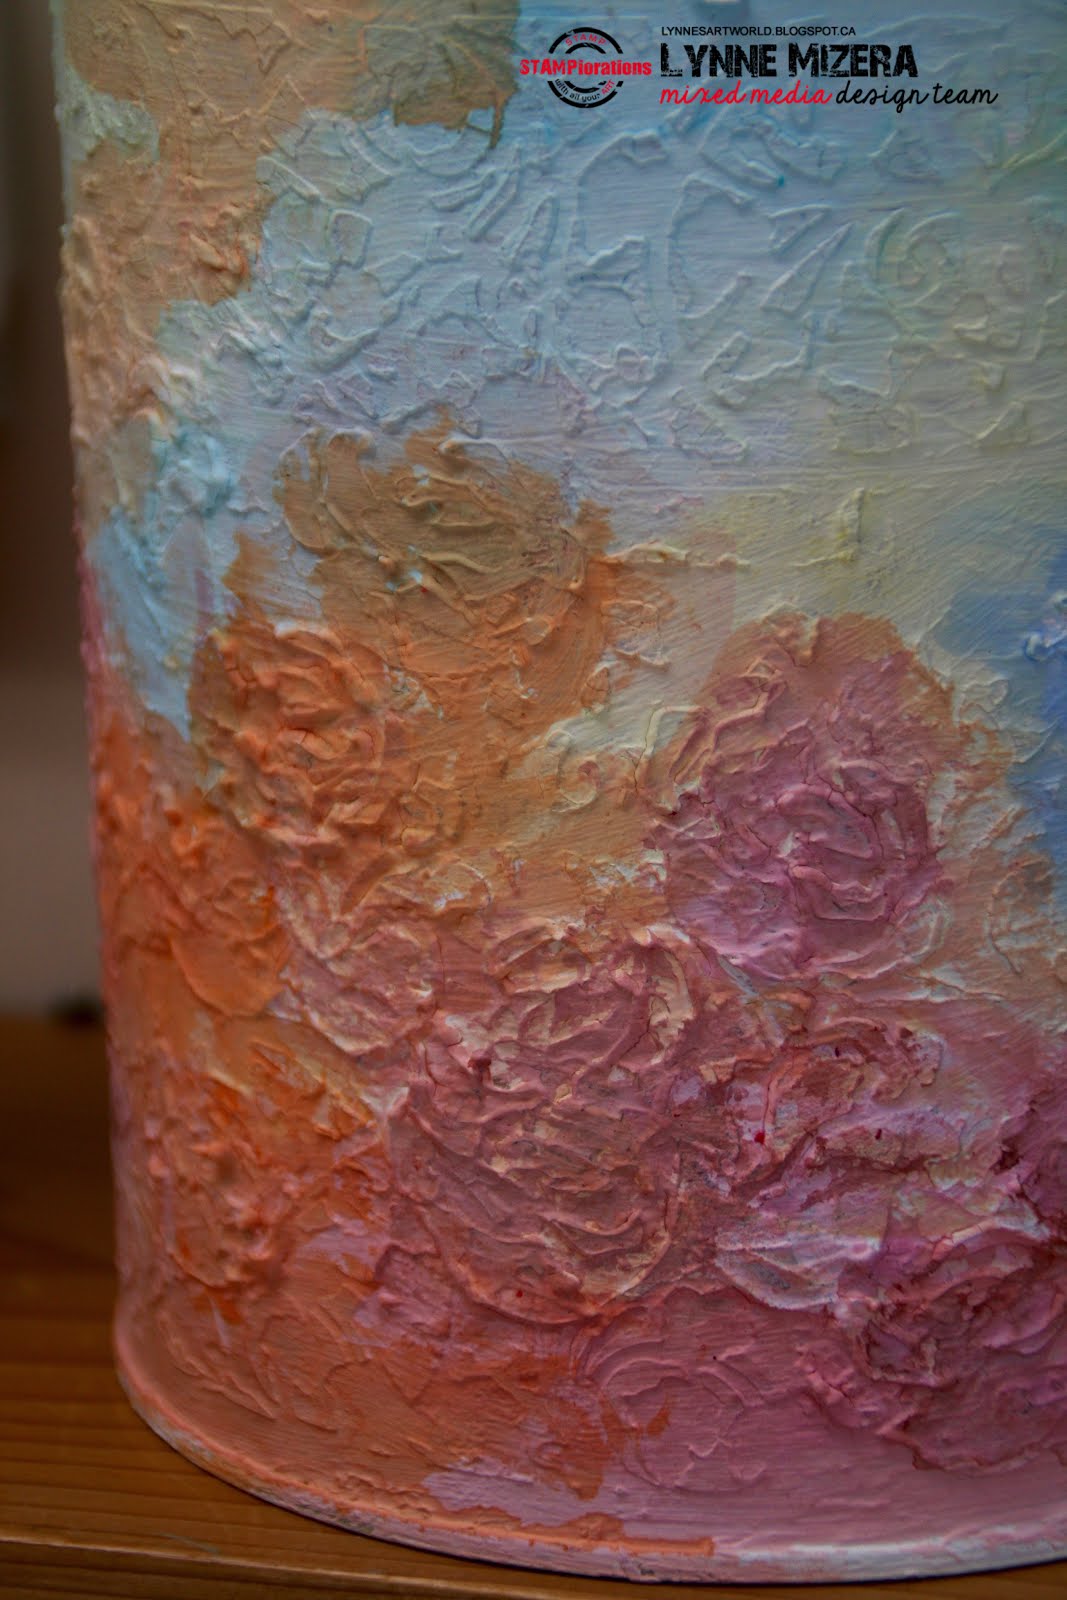
Starting with an empty Coffeemate tin I lightly sand the outside and use embossing pastes and stencils to add texture.  When the pastes are completely dry I paint the tin with a layer of thick, white gesso and then add my base color.
For this tin I used my Peerless Watercolors which blended beautifully and left me with a soft pastel background.
Then I use one of my favorite mixed media techniques... stamping onto tissue paper or the thin paper that you find in a large dictionary and using matte Mod Podge to paste the perfectly stamped image onto the lumpy, bumpy surface of my mixed media project. 
This dictionary I found in a second hand store for two dollars is my absolute favorite to use for this method and I love how the paper is almost transparent yet tough enough to handle inks, paints and Mod Podge.
When stamping your image make sure to use a waterproof ink, like Stayzon, or the image will bleed and run all over your project when you go to apply it.  I use a watered down matte medium, like Mod Podge to glue my images to the tin because the matte finish will absorb more paint and ink beautifully once it has dried.
 
The tin already looks fabulous and I could stop right now, leaving the stamped images just as they are, but I felt like I wanted to add more color.  So using the same Peerless watercolor paints, I tinted the centres of the flowers and added a light wash of colors onto only some of the petals...
I also used a fine point sharpie marker to outline the centers and redefined some of the petal lines on the flowers, which made them pop right off the background.  
And finally... I used Rangers Stickles on the centres of each flower and Liquid Glass on the petals to add the little bit of sparkle and shine which all my pieces seem to have...
It is really tough to photograph a round object so you can really appreciate the colors, the texture and the sparkle of this piece.   So here are a few super close ups to help you to see how lovely the texture and the colors turned out.
I make many, many of these tins, each reflecting the personality of the person I am gifting... This one is a little bit of early spring being sent to brighten up someones day.  And because I am filling it with muffins, the inside will be as yummy as the outside!

So thanks for popping in to see how I used my stencils this month.  I do hope I inpsired you to go make something with your stencils.  And if you do, please remember to add your project to this month's "Anything Goes Except a Card", Mixed Media Challenge.

 STAMPlorations Products Used On This Project:
ARTploration Stencil: Build Me a Rose
Stamp: Helenium-Large
Stamp: Hope Blooms
Other products used on the project:
Dreamweaver Embossing Paste
Finnabair Art Basics Heavy Gesso
Peerless Watercolors
Ranger Stickles
Stayzon Ink - Teal and Midnight Blue
CTMH Liquid Glass
Matte Mod Podge
Sharpie pen - black