Please Respect My Work...

All of the cards, layouts, handmade items and art work displayed on this website are copyright to me, Lynne Mizera. Of course I hope to inspire and encourage you and would be morethan happy for you to use any of my work to that end; however, please respect me and my work and do not directly copy any of my projects without crediting me or enter any of my work into any magazines or competitions without my express written permission. All my cards, layouts, projects and art work are not to be used by any commercial enterprise for any financial, marketing or commercial gain.

Showing posts with label PEBEO. Show all posts

Monday, January 22, 2018

Using Glass Paints On Canvas - Who Knew?! - A Tutorial By Lynne Mizera


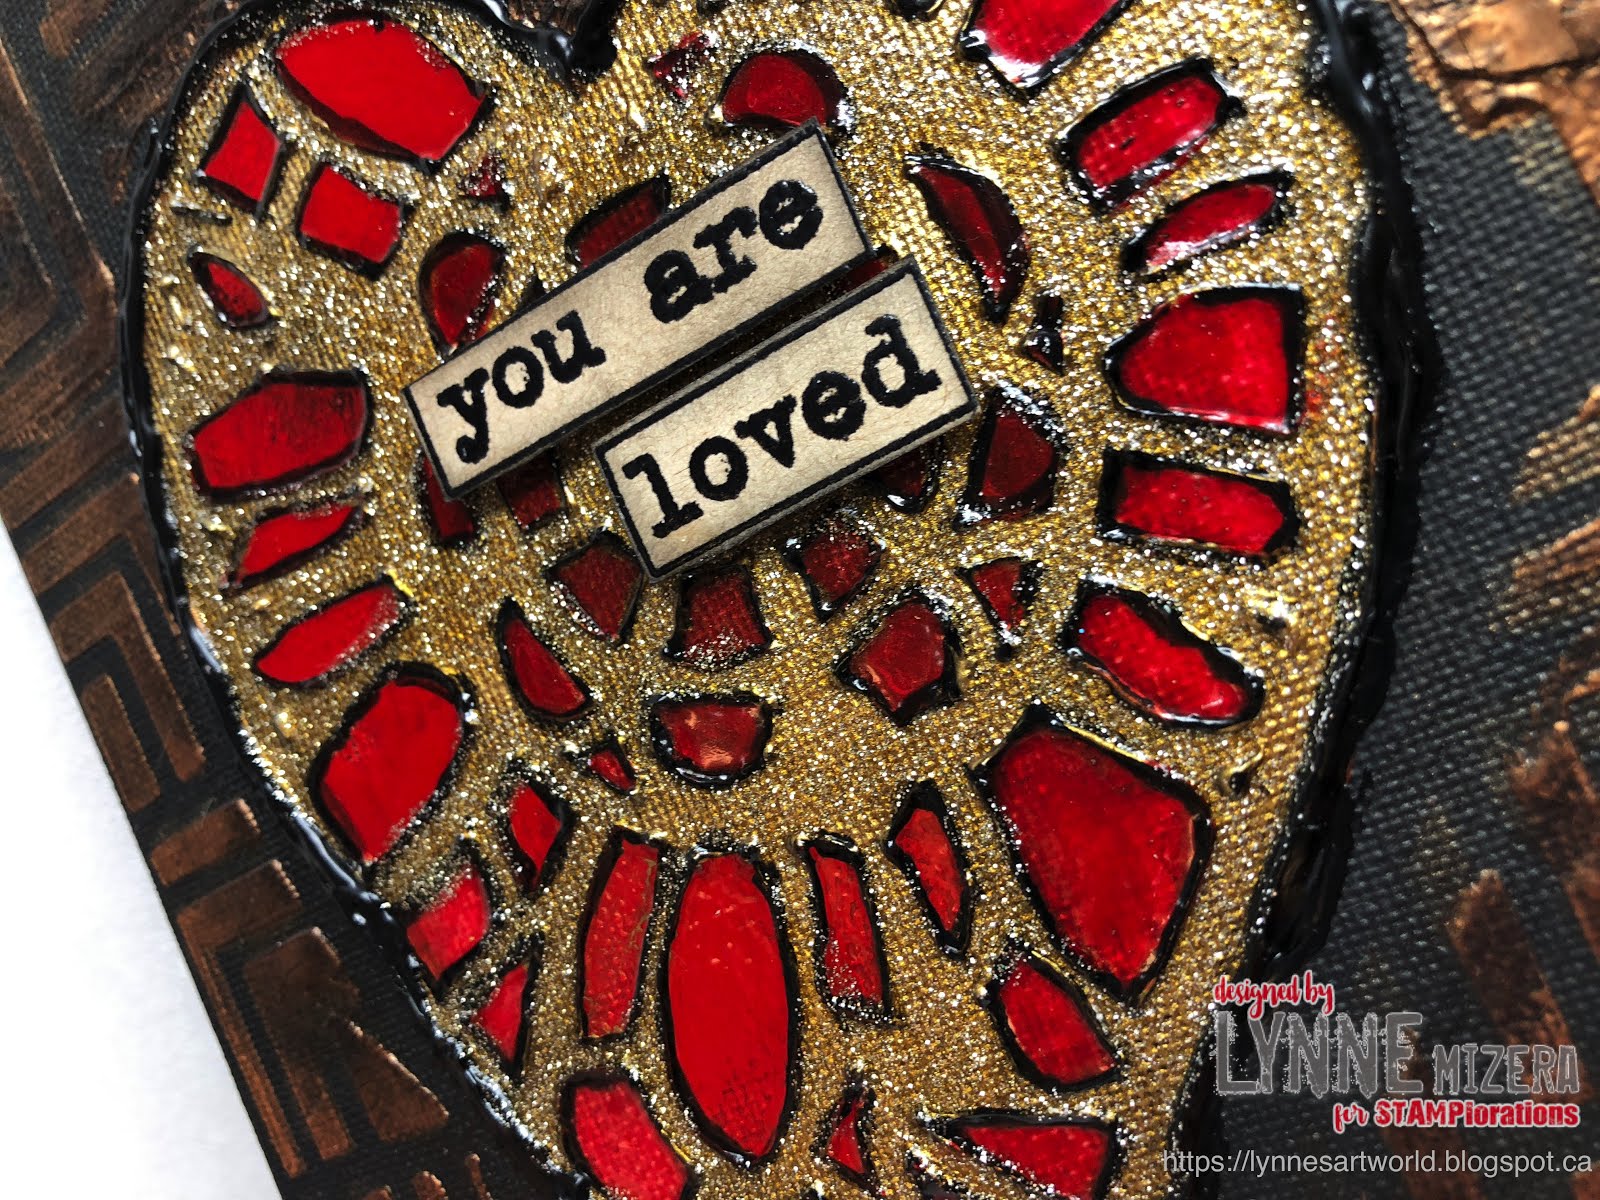
Hello and Happy Day everyone!  I am here today to share my monthly mixed media tutorial with all of you, one of my very favorite duties every month, and today I am sharing how I used my Pebeo glass paints with a stencil on a 5x7 board canvas to create this wonderful little piece that I can now pop into a frame (or not) and gift to someone special.
 
The steps are pretty simple, but the process takes a while as you need to allow the glass paints to dry and they do NOT like it if you try to quicken the process with a heat gun! (WARNING... heat and glass paints create fumes!!)  But if you give yourself the time to allow these paints to dry the results are spectacular.  So scroll down through all my photos to see how I created this wonderful piece...
 Begin by taping the stencil to the canvas and tracing the  shapes in pencil
Next, using Pebeo Cerne Relief, outline the shapes making sure there are no gaps in the lines, because you are creating cells to fill with product and you do not want any to leak out.


The Cerne Relief dries surprisingly quickly and in about 20 minutes you are ready to start filling those cells with color.  I am using a variety of Pebeo glass paints, The Vitrail is translucent and gives a stained glass effect, the Ceramic is opaque and looks like baked enamel and he Prisme and Moon paints dry to form a beautiful pounded metal effect... swoon...
 
As you can see I use a pretty simple method of dipping a wooden skewer into the paint and letting it run off the skewer into the cell... that's it, just be patient as the liquid is fairly thick and needs some time to move... it reminds me of when I was a kid and used to watch the molasses drip off the spoon... it's very therapeutic.

If I drip Prisme or Moon paint into a cell already filled with some Vitrail paint (the clear one), the Prisme or Moon paints rise to the surface and create these lovely, pounded metal effects...
 
This part of the process is one that cannot be rushed, and I just allowed myself to become lost in the process of creating until all the cells were filled... and now (I cannot stress this enough) LET IT DRY!  Overnight is probably the best and even then, if you are in a humid climate, it may still be tacky.  
Once the glass paints had dried I painted all around the heart shape with a matte black gesso.  Of course you can use black paint, but acrylic paints are glossy and I loved the effect of a matte (not shiny) background against the shiny, baked enamel-looking heart.
Next I painted in the heart shape using my Golden fluid acrylic gold paint, because I think Gold makes everything better,  don't you?
It was at this point that I decided the background was too plain so using some Dreamweaver bronze metallic embossing paste and the Square City stencil I broke up the black background, and I did not worry too much about being perfect because I wanted a slightly messy, grungy look.
At this point was also when I decided that all the patterns in the cells was just too busy for me, so I filled them all in using the Pebeo Porcelaine paint pen in red and I liked the effect much more.
I added the sentiment using the "It's All About You" stamp set, which I stamped and heat embossed with a clear embossing powder so the glossy letters would go with the glossy  heart.  And finally I filled all the gold background with a layer of glitter so that heart sparkles from across the room!
 
It was really hard to get a good photo of all the shimmer and glitter and shiny bits of this canvas, but these two are not bad...


And finally for those of you that need to know, here are all the products I used on this project.
 
 
As always, thank you for popping by to see what I created to share with you this month, and if you are inspired by my tutorial to use your stencils, please do link up to the January Mixed Media Challenge where it is always anything goes except a card as long as you use a stencil, Any stencil.


Lynne Mizera
for the STAMPlorations Mixed Media Design Team
 

STAMPlorations Products Used:
(Use this coupon for 20% off and don't forget you receive this discount even if the item is on sale and there is a BIG Sale going on right now!) 


IT'S ALL ABOUT YOU
DOODLED HEART
SQUARE CITY


Thursday, April 30, 2015

Fish And Fungus On a Jar?

Hello PEEPS! Today for my monthly Design Team post for Altered Eclectics I am excited to share some more of my exploration into the uses of PEBEO Glass Paint, and today I am actually painting on glass.  I took an empty plain jar with an attractive metal lid and did this to it.
It is a bit impossible to show the entire jar in one photo so here are several more photos showing different sides and one of the lid top...

Now creating this fun container was surprisingly easy, although time-consuming as I could only work on the jar one third at a time to allow drying time in between applications of product.  First I stamped my images right onto the outside of the jar using Stazon Ink which is made for stamping onto slick surfaces, like glass. I was able to stamp all around my jar in one go and the ink dried fairly quickly.
Then I applied the clear epoxy in a tube that creates the wee "pools" that will be filled with the glass paint.  This did dry in the 10 minutes as promised in the directions, and again I could do the entire circumference of the container fairly quickly.
Finally I filled the pools created by the epoxy with color.  I started first with a paint brush (not recommended), then with some Q-tips (also not recommended) and ended up using the pipettes that PEBEO recommends using. And which worked beautifully!
I needed to allow each side to dry until tacky, before turning the jar to next bit, so the paint did not run.  As I am NOT the patient type, you will notice one or two places where the color has run or pooled, but hey, isn't that part of the charm? Smile.  It took approximately 30-45 minutes for the paint to dry to tacky, but it took a full 24 hours before the paint was fully dry and smooth to the touch.
Now some of you may find this stamping, outlining, painting a bit at a time TEDIOUS... but I found it very therapeutic and I LOVE the effect... Next on to some custom wine glasses... What do you think?

OH Yeah, and I created this project for the May Altered Eclectics Challenge where Anything Goes All the Time as long as it is not a card or an ATC or a Scrapbook page!  So why not pop on over to see what everyone else created this month and we would LOVE to see one of your creations, you have until May 31st to link up.
PS:  Ooops, forgot to mention that these images are all from my Dyan Reaveley Dylusions collection! Grin
Cheers!
Lynne Mizera

Saturday, April 18, 2015

Be INSPIRED! and More PEBEO Vitrail Painting...

I am soooo excited to be participating in the Unity Stamp Company's {Be Inspired} Challenge for this Month (April 9th until May 13th) and the images and colors in this month's challenge totally inspired me to create this very first large canvas using more of the PEBEO Vitrail glass paints, Stencils and of course UNITY STAMPS
Here is the challenge photo... How did I do? Grin
I created the canvas background first using stencils, Liquid acrylic paints and spray inks.  Then I went to town using my Pebeo dimensional paint in a tube to outline everything I wanted to enhance and then I filled the butterfly wings with my Vitrail paints, these looked so good that I then allowed myself to add more Vitrail glass paint to accent and enhance colored areas and because they are translucent the images behind the paint still show through beautifully.

Then I stamped two of my favorite Suzi Blu Unity Stamp images using Archival Black Ink, Gypsy Warrior and Serenity Angel, and then I painted them using my Inktense pencils like watercolors because these ink pencils will not run after they have dried and the colors are amazing!
After I had cut out my images I mounted them using foam pop dots to the background so they actually POP right off the canvas at you...
The final touch was to add gold leaf as an accent and to help direct your eye around the canvas... this was so easy to do with Pebeo's special "glue in a tube" for gold leaf and their "mirror sheets"... I think you will be seeing a LOT more of this on my future projects!

I just LOVE the shiny and glittery texture I get with this medium and I hope you like this new direction I am taking my Unity Stamps because I SURE AM! Thanks for popping in to see what I am up to and don't forget to leave me a comment if you like what you are seeing!!
Cheers!
Scrapbook Lynne Mizera

Friday, April 17, 2015

Playing with PEBEO... Swoon, and Friends with Flair!

I am Baaaack! Smile... Sorry it's been so long between posts, but I have been REALLY sick from a bug I picked up at my 8-year old grandson's hockey tournament on March 23rd...
Grandson#2 and his Hockey Medal
 and then I was on a plane winging my way to Texas for a week-long visit and week of ART, eating, talking and BEACH with a my good friend Lisa (who I met at Christy Tomlinson's She Matter's Art Retreat last April)
Christy Tomlinson's SHE MATTERS Art Retreat, April-2014
and although I arrived home this past Tuesday, it took TWO DAYS to unpack all the stuff I brought back with me!  (Note: Hobby Lobby should show a big bump in revenue this month ... GRIN.)
Me & Lisa - Apres Beach IceCream Cones...Swoon!

 So ANYWAY... One of the new-to-me products I stumbled upon and bought are these awesome glass paints and dimensional glazes from a french company PEBEO... 
and they are one of the reasons I had to go back to Hobby Lobby THREE times and why I needed to purchase a FOURTH suitcase to get home. (Ha!Ha!Ha!)  
 
Canvas #1 Using Stampedous and Unity Stamps
And I am sharing these two wee 5x7 canvasses I created using my stamps, Stazon ink and Pebeo's glass paint product - VITRAIL...
Canvas #2 using my Unity Donna Downey Poppies stamp
I first stamped the entire canvas with a book page stamp and Stazon black ink;
I then outlined the flower images with a dimensional paste that mimics stained glass leading;
Can you see how the glaze shimmers and shines when dry?
Then, using pipettes, I filled each space I created with the dimsional paste with these jewel-like colors. As you can see these Vitrail colors are made for glass so they are totally transparent and the stamped images are completely legible through the colored glaze.  
The backgrounds took about 12 hours to dry completely after which I stamped, painted with my InkaGold paints, cut out and mounted using pop dots, one of my favorite Suzi Blu Unity stamps "Chickadee and Me" - so OF COURSE I am linking this up to Unity Stamps' Friday's "Friends with Flair" today!

So you can count on my regular blog posts going forward, and stay tuned for some pretty awesome stuff coming your way using my new Pebeo paints and glazes!!
Cheers...
Scrapbook-Glass-Mixed-Media-Artist, Lynne Mizera
(grin)